
Thanks for submitting your ring details. Let’s take the next step!
The next step in our process is to gather your appraisal and take photos and videos of your ring(s), so that we can create your listing page and marketing materials. Please read the directions below before submitting. When your pictures are complete, email us at hello@forricherjewelry.com. You got this!
Step 1. Gather your materials.
You’ll need your ring(s), a phone, and white background materials. We recommend blank white computer paper, paper towels, or cloth. The less textured the better, so we prefer white paper or smooth fabric like silk.
Find a place in your home that has bright natural but indirect light. We highly recommend in front of a window, where the light is nice and bright but not shining down directly (which would cause shadows). Natural light will always work better than electric lights.

Step 2. Set up your photoshoot.
Clean off your camera’s lens (we are guilty of smudgy phone camera lenses ourselves).
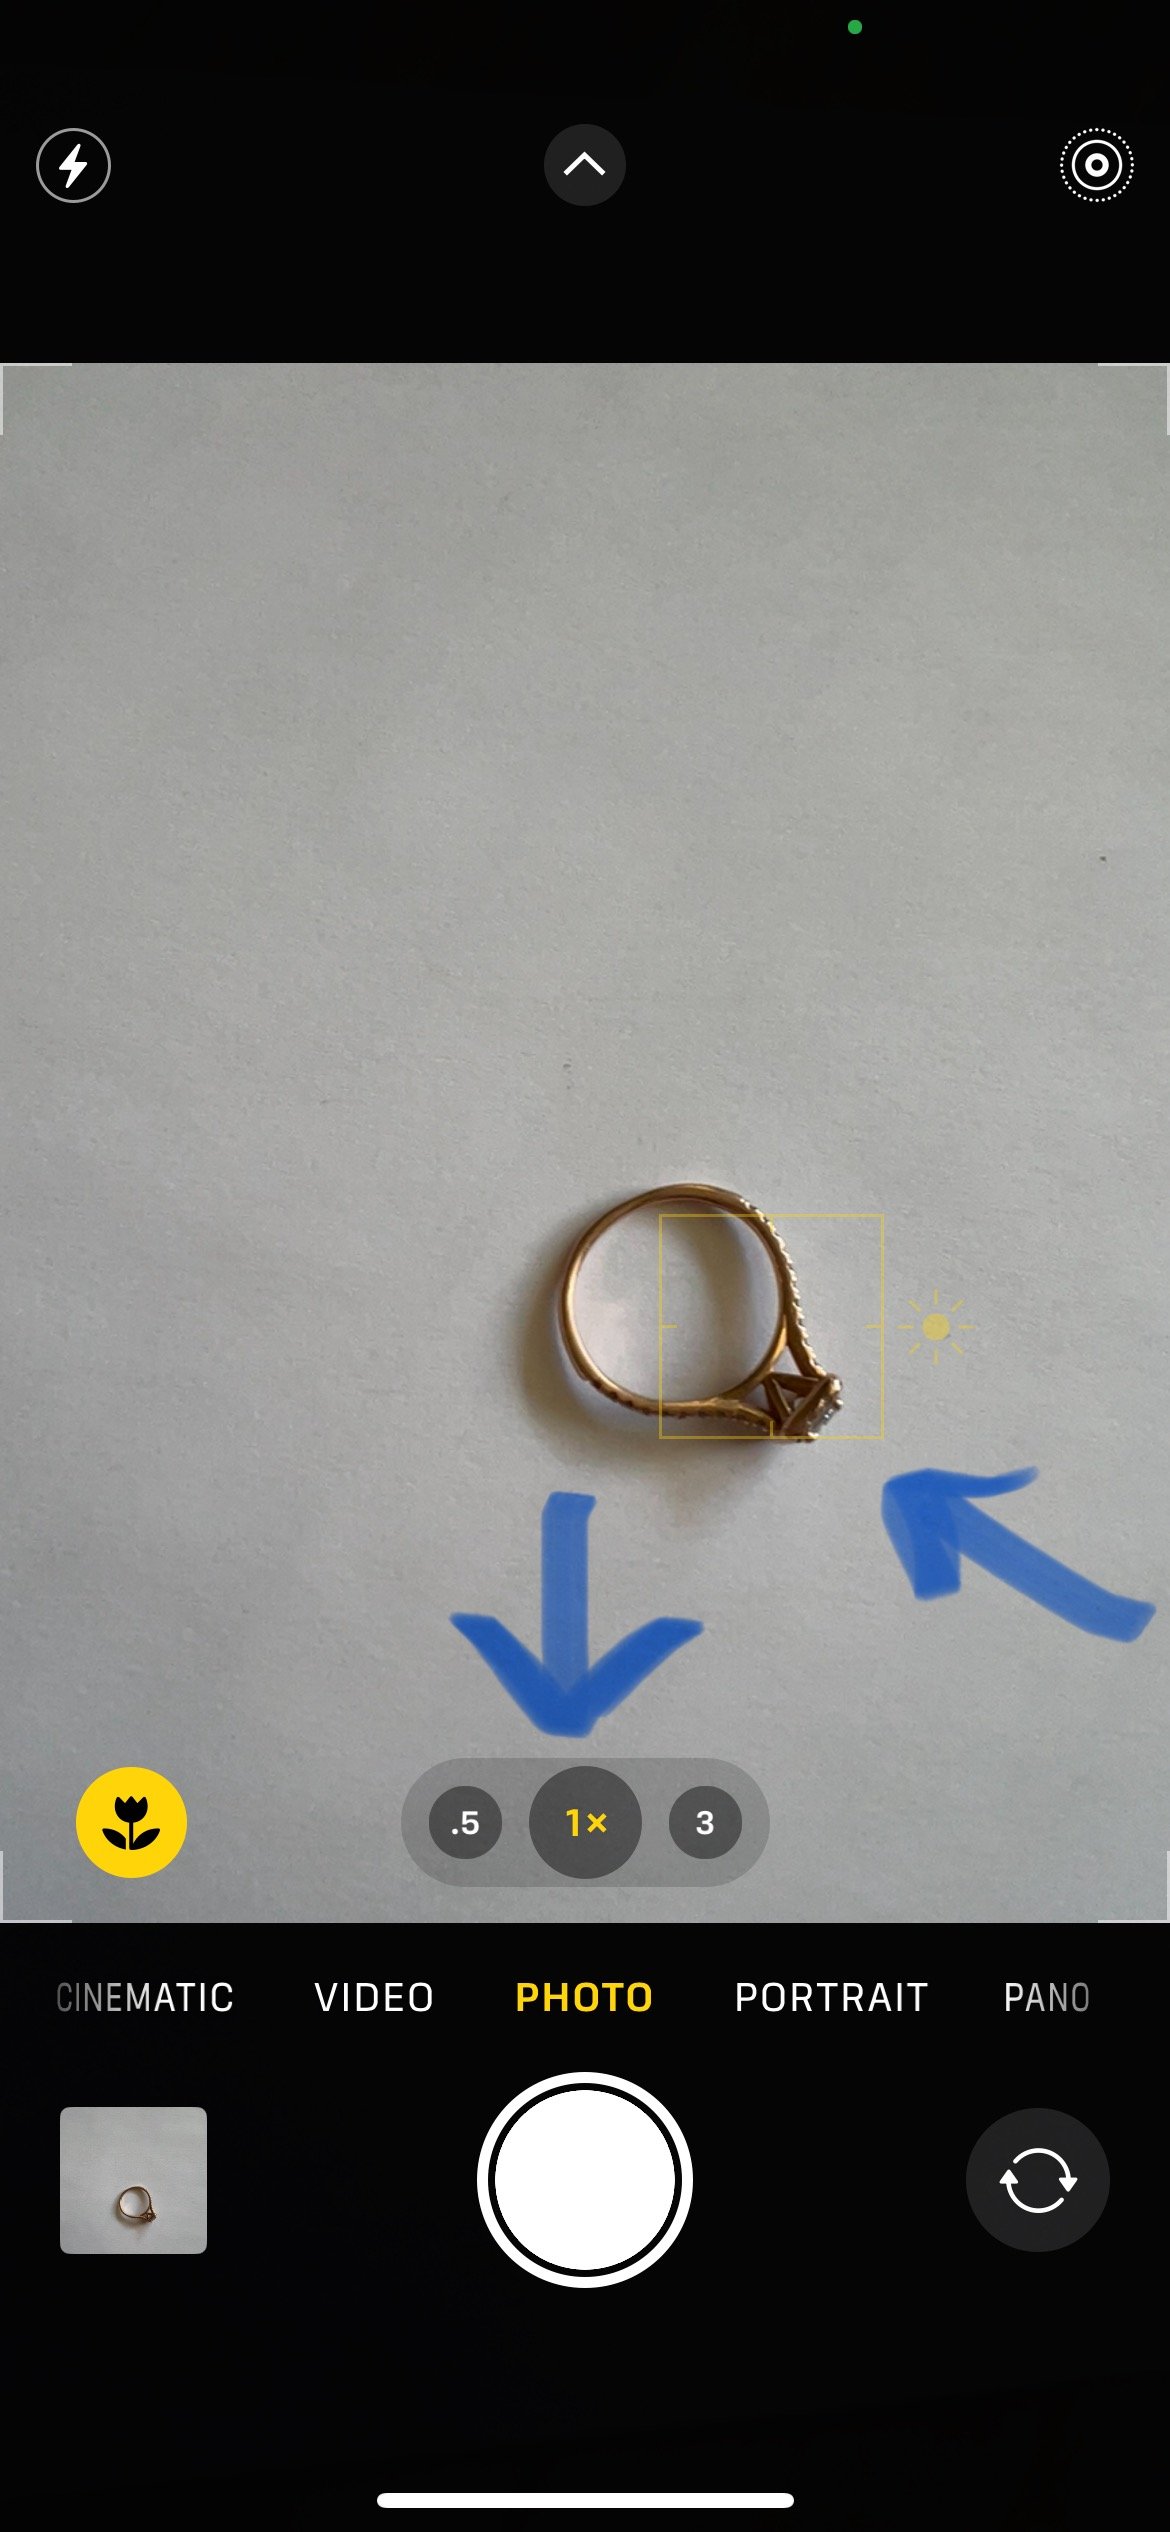
Set your ring flat on the white background
Open your phone’s camera app and make sure the settings are 4:3 (this is the default setting) and 1x zoom
Hit up arrow on the top of the screen, and make sure 4:3 is selected
Make sure 1x is selected at the bottom of the window
Click the screen with your finger, so the yellow box appears (iPhone) and focus it on your ring
Step 3. Take pictures of your ring laying flat
With your ring laying flat on the white background, take pictures from several angles:
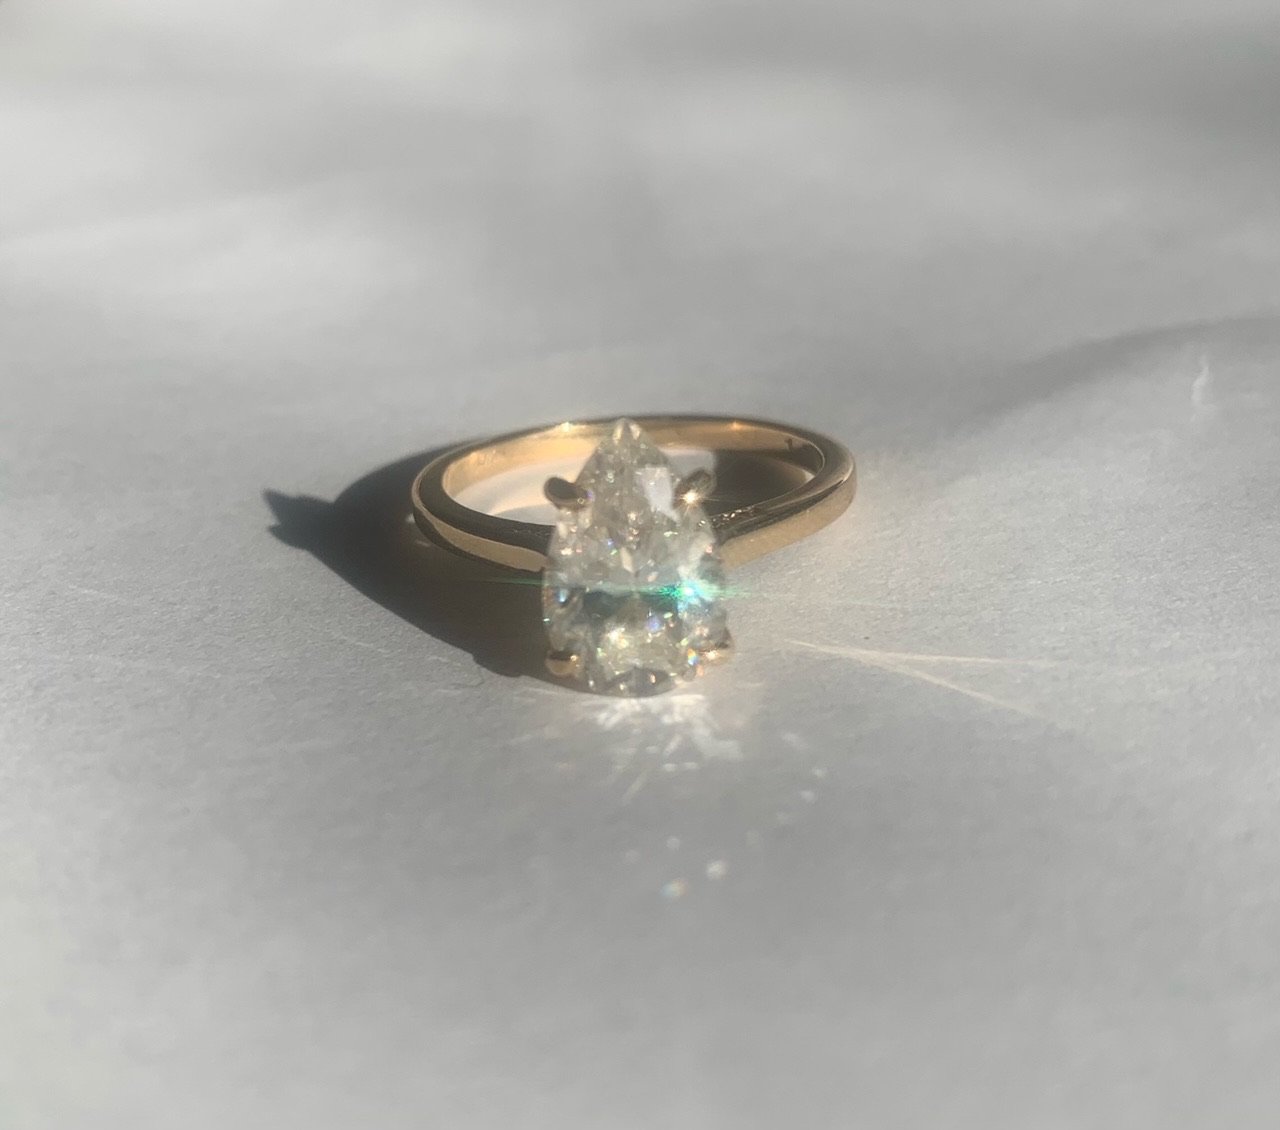
Directly overhead: Stand so that your shadow doesn’t fall over the ring(s) and snap a shot directly overhead. Your phone should be 3-6 inches above the ring.
Angled: face the center stone of your ring towards the window and take a photo of your ring head on.
Angled and rotated: turn the center stone 90 degrees in either direction and take another photo the same way you did above.
Take 2-3 pictures of each view, so that we have a lot to work with and choose from several to edit. After this, you should have 6-9 photos.

Directly Overhead

2. Angled
3. Angled and Rotated
HELPFUL HINTS
Keep your phone about 3-6 inches above the ring, so that it looks clear and crisp in the camera app. It’s important that you can clearly see the facets of the stone(s) as you focus on the ring
A good test is being able to zoom in on the picture - if you zoom in and it’s blurry, try again!
Put your back to the window/light source when taking pictures; this will minimize shadows and showcase your ring the best. It’s just like taking a group photo - your face to the light, the photographer’s back to the light!
Play around with moving the brightness up and down (when you click the yellow box, you can slide the sun up and down.
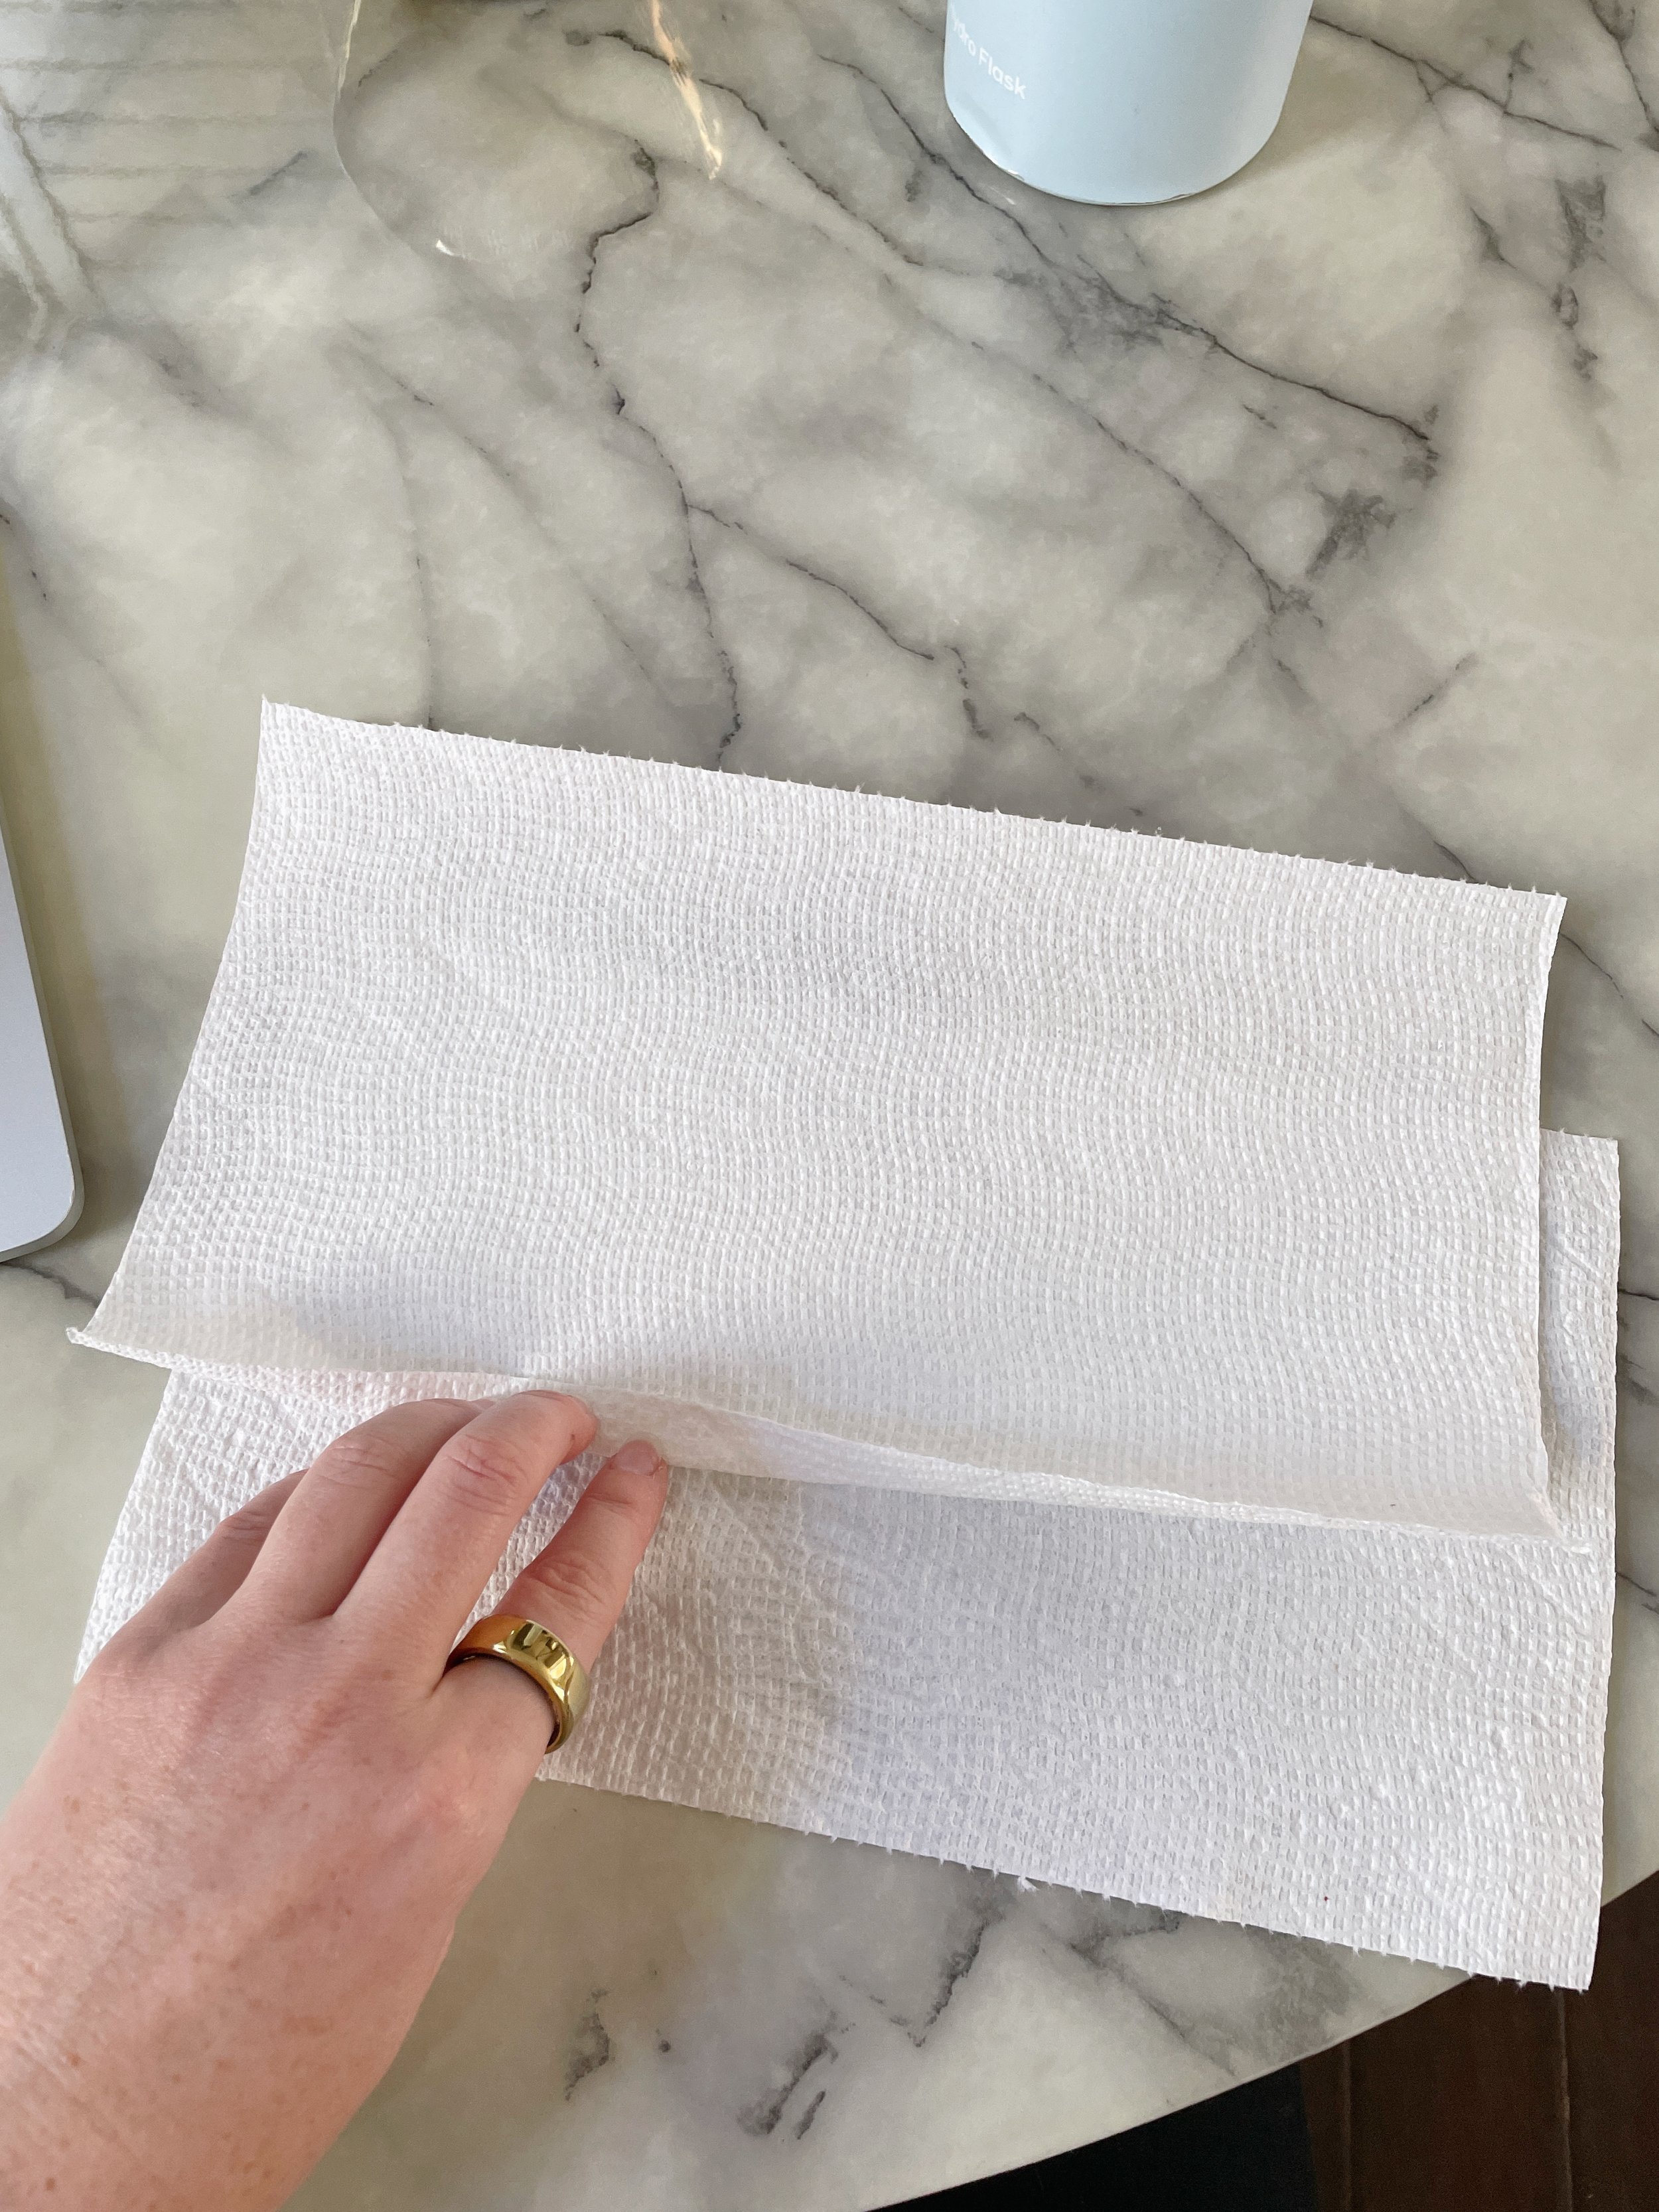
Step 4. Roll up a piece of paper or white cloth
Roll up a paper or cloth lengthwise (so you’re rolling up the long side) and as tightly as you can so your ring slides on smoothly without distorting the roll. Make sure the seam is in the back.
We keep hands out of photographs for the same reason people take down personal pictures in homes they are selling. We want the buyer to see themselves in the ring! So we used a rolled up paper or cloth instead of our finger.

Step 5. Take your “finger” pics
With one hand, hold the rolled-up paper or cloth with your ring on it 3-6 inches above the white background you were using. White on white will show off your ring the best and let us edit it seamlessly. We need 3 more views (you’re almost done!!!!).
Overhead. With the center stone facing up, take a picture directly overhead, as though you were taking a photo of your hand with the ring on it. Your phone should be 3-6 inches above the ring.
Rotate the rolled-up paper a quarter turn, and get a side profile picture of the ring
Rotate the rolled up paper one more quarter turn, so the center stone is facing away from you, and take a picture of the backside of the band.
Take 2-3 pictures of each view, so that we have a lot to work with and choose from several to edit. In total, you should have 12-18 photos

Overhead view

2. Side view

3. Rear view
Step 6. Take 2-3 videos.
We’ll feature your rings on social media, so videos can help a ring sell faster. Keep your ring on the white background (laying flat works best) and zoom in and out while moving around the ring, so you can see the details of the ring (center stone, setting, and band details).
You can feature your hands in these videos to show the size and proportions of the ring
You can send several videos and we’ll polish them up for you
Don’t worry about background noise
ideally they are each about :30
Go slow! sloooowwwwly move your camera around.
Step 7. You’re DONE! Email us!
Congratulations. You did the hardest part of listing with For Richer. Now, add all your appraisal, pics, and videos to an email and send them to us at hello@forricherjewelry.com, or click the button below to open an email.
When you send photos, please select “actual size” so we can get the highest quality images. We’ll take these and your ring specs you already submitted and work up a listing for you.
When you send videos, they can compress via email, so you can send them via Google drive.
When you send your appraisal, you can send us a pic of it or a copy you have downloaded, either is fine! If you do not have an appraisal yet, that is ok to proceed, but you’ll need it ASAP.
It’s ok if you need to send several emails. We’ll get back to you soon!